

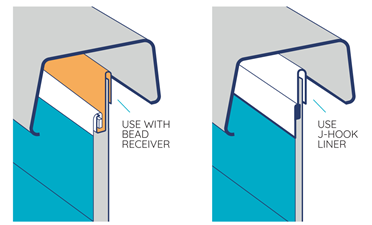
UniBead liners can be used in two ways; either as a traditional Beaded Liner in a swimming pool that uses a Bead Receiver or as a J-Hook Liner in a pool that does not use a Bead Receiver. (That last part may sound repetitive but we'll cover why the distinction between using or not using a Bead Receiver is important below.) You can view the differences in the Beaded Liner and J-Hook liner design in the images below and then we'll cover the installation instructions for each after.
WARNING: Failure to follow installation instructions will damage the pool liner and void the warranty. Click here for more information on Liner Warranties.
After you have determined which style you are going to use, you should always refer to the instructions that came in your pool manual for installing your liner as they will vary slightly from each manufacturer.

Installation Instructions
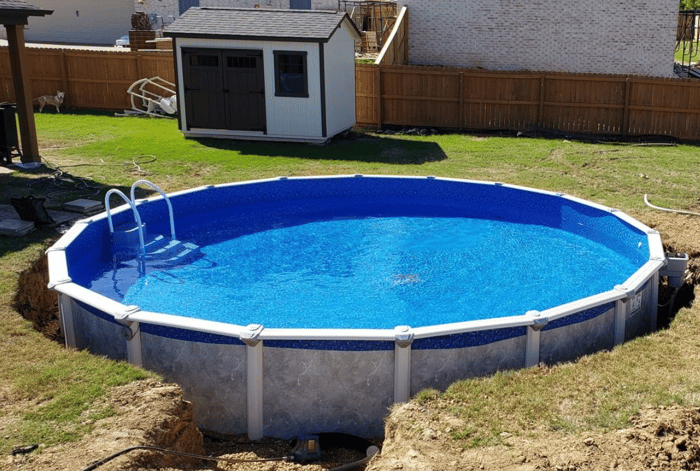
Make sure you put an earth mound/cove (6 X 6 wedge) around the bottom of the pool wall to protect the liner from touching the metal frame.
.png?width=600&name=Uni-Bead%20System%20Swimming%20Pool%20Liner%20Installation%20Illustrations%20-%202@2x%20(2).png)
For either type of installation, unfold and orient the bottom floor of the liner in the pool. For a round or oval pool, lay out the floor of the liner so it is centered exactly in each direction. Smooth out the floor of the liner by pushing it toward the pool wall. A soft push broom makes this job easier than doing it by hand. NOTE: Never forcefully pull or drag the liner.
A UniBead liner can be hung link a J-Hook liner right out of the package by hooking the liner to the top of your pool wall. If you plan to use a UniBead liner as a Standard Beaded Liner, there is an additional step you must take as well as an additional part you will need.
Beaded Liner Modification for Unibead Liners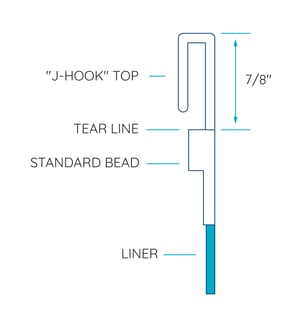
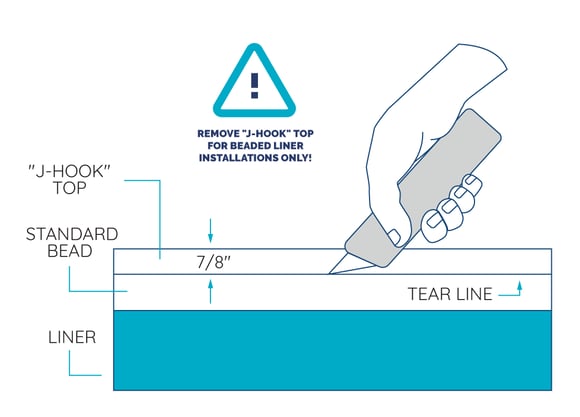
Most folks choose this route when replacing an older Beaded liner with a new Unibead liner. You will need a Bead Receiver in order to use your UniBead liner as a Standard Beaded Liner. If you are replacing a Beaded liner you should already have the Bread Receiver, also known as Bead Track, attached to your pool. To use a Unibead liner with a bead receiver you must trim off the J-Hook portion of the UniBead system.

Using a Utility Knife/Box cutter, CAREFULLY slice in between the grove on already existing on the Unibead Tear Strip (just above the rectangular beaded portion), approximately 7/8" from the top of the bead.
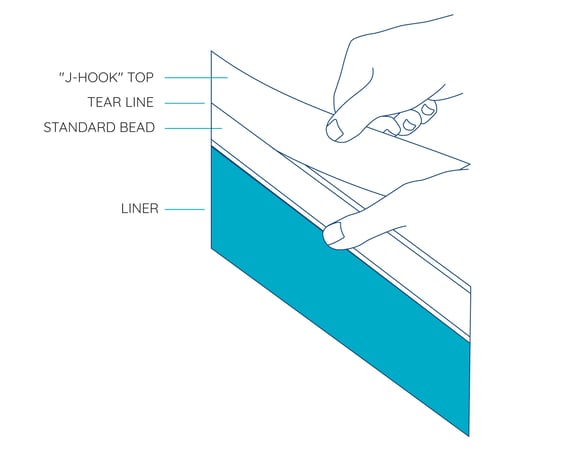
Then simply separate J-Hook section from the Liner by tearing along the tear line all the way around the liner. You'll be left with a Standard Bead Discard the separated J-Hook section. Install as conventional Beaded Liner.
Finalizing the Liner Installation
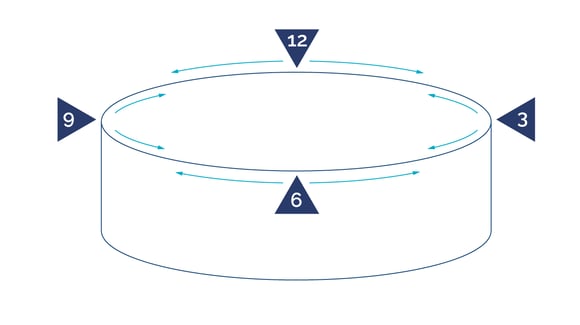
This will be where you'd begin your liner installation steps if you have a Beaded Liner. Now you are ready to attach the wall of the liner to the pool. You should attach the liner on the wall in about the 6 or 8 places.
On ovals, start at the beginning of each radius in 4 places and then in the center of the two radius areas and straight sides.
On round pools, begin at the 3. 6. 9, and 12 o'clock positions.Using masking or electrical tape, if necessary, to hold the liner in place. Make sure that you attach the wall perpendicular to the floor of the pool. If you have someone else helping you, start from any two positions (9 and 3 or 12 and 6) and work the liner onto the wall from each until they come together.
If you do not attach the liner to the wall in this manner, begin in one location and work your liner wall completely around the pool and one of two situations will exist. Either you will have an excess of material or flap on the circumference of the wall or you will be short and have to stretch the material to make it fit properly. Keep in mind that liners are designed to be able to stretch however, you want to do this mindfully and gently in order not to rip your liner in the process. Installing your liner on a warmer day will allow you to stretch the liner more easily.
Looking for more tips? Check out these other articles: