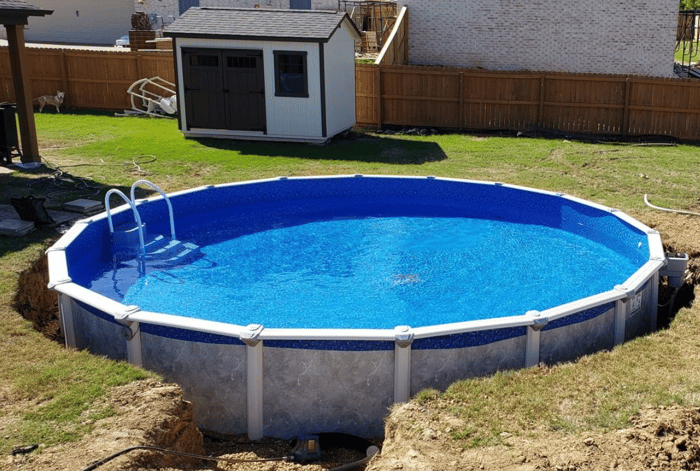

Filling In an Inground Pool: A Comprehensive Guide
Filling in an inground pool is a significant decision that many homeowners consider for various reasons, such as reducing maintenance costs, eliminating safety concerns, or repurposing the space for other uses. The process involves more than just covering the pool with dirt. It requires careful planning, proper execution, and adherence to local regulations.
This guide walks through the main steps, from initial preparations and pool draining to backfilling, cost considerations, timelines, and final landscaping.
Quick Answer: How Do You Fill In an Inground Pool?
Filling in an inground pool usually involves getting local permits, draining and cleaning the pool, removing accessories and equipment, breaking or perforating the pool structure for drainage, backfilling the cavity in compacted layers, and finishing the area with topsoil or landscaping. Because permits, drainage, and compaction are important, many homeowners choose to work with a professional pool removal or demolition contractor.
Preparations for Pool Filling
Before you begin filling in an inground pool, it’s essential to prepare thoroughly to avoid potential legal, structural, and drainage issues. Consider the following steps:
-
Obtain necessary permits: Start by contacting your local municipality to determine the specific permits required for pool removal. These permits ensure that your project complies with local building codes and environmental regulations. Failing to obtain the proper permits can result in fines, delays, or even being required to restore the pool.
-
Consult local regulations: Each area may have unique regulations regarding pool removal, including guidelines on how the pool should be decommissioned and how the fill material should be handled. Some areas may require specific types of drainage or prohibit certain materials for backfilling. Consulting with local authorities or a knowledgeable contractor can help ensure that your project is compliant.
-
Hire professionals if needed: While some homeowners may attempt to fill in a pool themselves, hiring professionals is often advisable, especially for larger or more complex pools. Experienced contractors can handle the demolition, backfilling, and compaction processes efficiently and safely, reducing the risk of future problems such as settling or drainage issues.
-
Important: An inground pool should not simply be filled with loose dirt. Without proper drainage, structural breakup, backfill material, and compaction, the area may settle unevenly or develop drainage problems later.
Pool Fill-In Process Overview
The exact process can vary depending on the pool type, local requirements, and the condition of the pool, but most fill-in projects follow the same general sequence.
|
Step |
What Happens |
Why It Matters |
|---|---|---|
| Permits and planning | Check local requirements before starting | Helps avoid fines, delays, or required corrections |
| Drain and clean the pool | Remove water, debris, accessories, and equipment | Prepares the structure for safe demolition and filling |
| Break or perforate the structure | Create drainage openings in the pool shell | Helps prevent water buildup and future settling |
| Backfill in layers | Add gravel, fill, soil, and topsoil in compacted layers | Reduces the risk of sinkholes or uneven settling |
| Restore the area | Add grass, landscaping, patio space, or another use | Makes the yard usable again |
Draining and Cleaning the Pool
Properly draining and cleaning your pool is a critical first step in the fill-in process. Follow these detailed steps to ensure everything is done safely and correctly:
-
Turn off the pool pump and filter system: Begin by disconnecting all electrical components related to the pool, including the pump, filter, and heater. This prevents any accidents or damage during the draining process. It’s important to double-check that all power sources are completely turned off to avoid electrical hazards.
-
Use a submersible pump to drain the water: Attach a submersible pump to the main drain or use a separate drain to remove the water. Direct the hose to an appropriate drainage area, such as a sewer cleanout or a storm drain, and ensure it complies with local water disposal regulations. Depending on the pool size, draining can take several hours to a couple of days, so plan accordingly.
-
Remove pool accessories and equipment: Once the pool is drained, carefully remove all accessories such as ladders, handrails, diving boards, and any attached slides. Additionally, remove any pool lights and plumbing fixtures that will no longer be needed. Store or dispose of these items properly, especially if they contain hazardous materials like certain types of pool lighting.
-
Clean the pool thoroughly: After removing all accessories, scrub the pool walls and floor to eliminate any remaining algae, chemical residues, and debris. This step is crucial to prevent soil contamination and to prepare the pool structure for the next phase. Pay extra attention to any stains or buildup, as these can be difficult to address once the pool is filled in.

Breaking Up the Pool Structure
Breaking up the pool structure is a crucial step in the fill-in process, as it ensures proper drainage and stability of the filled area. The method you use will depend on the type of pool you have:
-
Concrete pools: Use a jackhammer or similar heavy-duty equipment to break up the pool’s concrete walls and floor. Start by creating large holes in the bottom of the pool to ensure that any future groundwater can drain through these openings. Continue breaking up the concrete into manageable pieces, which can be left in the pool cavity as part of the backfill material. This not only helps with drainage but also reduces the amount of fill material needed.
-
Fiberglass pools: Fiberglass pools are typically easier to dismantle. Begin by cutting the fiberglass shell into smaller sections using a saw or cutting torch. These sections can then be removed from the ground entirely or, in some cases, perforated and left in the cavity to allow for proper drainage. It’s essential to handle fiberglass carefully, as it can be sharp and hazardous during removal.
-
Vinyl-lined pools: Start by removing the vinyl liner, which is usually attached to the pool structure with clips or adhesive. Once the liner is removed, you’ll need to dismantle the supporting structure, typically made of steel, aluminum, or polymer panels. Use tools like a reciprocating saw or angle grinder to cut through these materials. Ensure that the panels are perforated or removed completely to avoid future water buildup.
-
Ensure proper drainage: Regardless of the pool type, it’s vital to make sure the bottom of the pool is sufficiently broken up or perforated to allow water to drain. Without proper drainage, the filled area could become waterlogged, leading to settling or other structural issues in the future. If you’re unsure about the drainage requirements, consulting a professional can help prevent costly mistakes.
Filling the Pool Cavity
Filling the pool cavity correctly is essential for preventing future settling and ensuring that the area remains stable over time. Here’s a step-by-step guide to properly backfilling your pool:
-
Start with a gravel base: Begin by laying a layer of clean gravel or crushed stone at the bottom of the pool cavity. This initial layer promotes proper drainage and helps prevent water from accumulating at the base. Typically, a 12 to 18-inch layer of gravel is recommended. Spread the gravel evenly across the entire pool floor, ensuring it fills in all low spots and provides a solid foundation.
-
Add layers of fill material: After the gravel base is in place, start adding layers of fill material. Commonly used materials include a mix of gravel, sand, and soil. These should be added in 6 to 12-inch layers. After each layer is added, compact it thoroughly using a plate compactor or similar equipment. Proper compaction is crucial to avoid future settling, which can lead to sinkholes or uneven ground surfaces.
-
Monitor and adjust the fill material: As you continue to add layers, monitor the fill material for consistency and compaction. If you notice any soft spots or areas that aren’t compacting well, address these issues immediately by adding more gravel or adjusting the material mix. This helps ensure that the fill is stable and won’t shift over time.
-
Finish with topsoil: Once the pool cavity is filled to within a few inches of the ground level, switch to topsoil. Add a final layer of topsoil to match the surrounding landscape, typically 4 to 6 inches deep. This top layer should be rich in nutrients and free of rocks or debris, making it suitable for grass, plants, or other landscaping options. Rake the topsoil smooth to create a level surface, ready for seeding or sod installation.
Filling In vs. Full Pool Removal
Filling in a pool often involves partial removal, where sections of the pool shell are broken or perforated for drainage before the cavity is backfilled. Full pool removal usually involves removing the entire pool structure from the ground before filling the space.
Full removal may cost more, but it can be preferred if the area will support new construction, major landscaping, or other future yard improvements. Local requirements can vary, so confirm which method is allowed before starting the project.
Cost Considerations
Costs can vary depending on the pool type, size, access to the backyard, local permit requirements, disposal needs, fill material, and whether you hire a professional contractor. Use the table below as a general planning range, not a guaranteed estimate.
|
Expense |
Estimated Cost Range |
| Permits | $200 - $500 |
| Professional labor | $2,000 - $8,000 |
| Equipment rental (e.g., jackhammer) | $200 - $500 |
| Gravel and fill material | $500 - $1,500 |
| Topsoil and landscaping | $500 - $2,000 |
| Total Estimated Cost | $3,400 - $12,500 |
Final Landscaping and Restoration
Once the pool cavity is filled, you can restore the area to its original state or repurpose it. Common options include planting grass or gardens, installing a patio, creating a play area, or adding a new outdoor living space.
Consider drainage, soil composition, sun exposure, and future use when planning your landscaping. If the filled area is not compacted properly, settling may occur over time, so monitor the space after the project is complete.
Time Required for Filling a Pool
The time required to fill in an inground pool can vary based on several factors, but most projects are completed within one to two weeks. Here’s what influences the timeline:
-
Pool size and type: Larger pools or those with complex structures, such as reinforced concrete or deep end sections, will take longer to drain, break up, and backfill. Smaller pools or those with simpler structures like vinyl-lined pools may require less time.
-
Permitting and preparation: Securing the necessary permits and preparing for the project can add a few days to the timeline, depending on how quickly your local authorities process applications. Hiring professionals or coordinating with multiple contractors can also impact the start date.
-
Demolition process: Breaking up the pool structure, particularly if it’s made of concrete, can be labor-intensive and time-consuming. The availability and efficiency of demolition equipment, as well as the need for disposal of materials, will affect how quickly this phase is completed.
-
Backfilling and compaction: Properly filling the pool cavity with multiple layers of gravel, soil, and topsoil, while ensuring each layer is compacted, is a meticulous process. Rushing this step can lead to settling issues later, so it’s important not to cut corners, even if it extends the timeline.
-
Weather conditions: Adverse weather, such as rain, can delay the project by making excavation and compaction difficult or even impossible. Dry, stable weather conditions are ideal for this type of work and can help keep the project on schedule.
Pros and Cons of Filling In a Pool
Pros:
- Reduces maintenance costs and ongoing pool responsibilities.
- Can eliminate certain safety concerns.
- Frees up yard space for landscaping, patios, gardens, or outdoor features.
- May make the yard more versatile for future use.
Cons:
- The initial cost of filling in a pool can be significant.
- The process is difficult and expensive to reverse.
- May require ongoing monitoring of the filled area to prevent or address settling.
- Permits, drainage, and disposal requirements can add complexity.
How to Fill In an Inground Pool - Frequently Asked Questions
Do I need a permit to fill in an inground pool?
In many areas, filling in an inground pool requires a permit and must comply with local building codes, zoning rules, and drainage requirements. Check with your local municipality before starting so you understand what is allowed and whether inspections are required.
Can I fill in an inground pool with dirt only?
Not usually. A stable fill-in project typically requires drainage preparation, gravel or crushed stone, compacted fill material, and topsoil. Filling a pool with only loose dirt can increase the risk of settling, sinkholes, or drainage problems later.
Can I fill in a pool myself, or should I hire a professional?
Some homeowners may be able to handle parts of the project themselves, but professional help is often recommended for larger pools, concrete pools, drainage planning, demolition, and compaction. A contractor can also help confirm local requirements and reduce the risk of future settling.
How do I keep the filled-in pool area from settling?
Proper drainage, layered backfill, and thorough compaction are the most important steps. Fill material should be added in compacted layers rather than dumped in all at once. The area should also be monitored after completion, especially after heavy rain.
What can I do with the space after filling in a pool?
The area can be turned into a lawn, garden, patio, play area, fire pit area, or outdoor living space. If you plan to add a heavy structure, confirm that the filled area was compacted properly and is suitable for that use.